Is it your first time you want to rent a scooter and you are a little bit afraid of how it works? No worries. Take a scooter lesson and learn how to drive a scooter in a asian country like Sri Lanka.
Scooter Tutorial for beginners – Step by step instruction to start the bike
Learn how to get a automatic motorbike started. As a beginner it is advisable to choose a automatic scooter. They are easier to ride. Read more information about every step below.
- Choose a helmet and put it on
- Put the key in and turn it
- Sit on the motorbike
- Grab the handlebar
- Check the mirrors
- Release the kickstand
- Pull the left break
- Press the start button
- Give gas
- Release the break
- Put your feet on the scooter
1. Choose a helmet and put it on
Rental companies offer usually a bunch of helmets where you can choose the one which fits best to your head. There are open helmets and closed helmets (with a flip up visir). Be aware if you choose a closed one you should close it when driving. If you decide to let it open the headwind will be your enemy and your helmet somewhere in your neck. And please don’t choose a helmet just it looks good, it must fit! It’s also advisable to choose a closed one with a transparent visir. If it is too dark you can’t drive at night.
2. Put the key in and turn it
Put the scooter key in the lock. Turn it to the right. If it is not possible you have to release the handlebar lock first. Wiggle the handlebar a little bit and try to turn the key at the same time. You will feel when it is unlocked. Now the scooter is on but not the engine. Like in a car the dashboard lightens up and functions like flashlights are working. But you can’t drive yet.
3. Sit on the motorbike
Sit down and let your feet still on the ground. Also small people should reach the ground.
4. Grab the handlebar
When you sit comfortable grab the handlebar.
5. Check the mirrors
It is important that the mirrors are in the right position. Take your time and make sure that you can see perfectly.
6. Release the kickstand
There a two common types of kickstands. Either just at one side like on a bicycle or a big one on both sides. To lift the second one push the scooter a little bit forwards.
7. Pull the left break
Now it’s time to start the engine. The first part is to hold the left break, don’t release.
8. Press the start button
While holding the left break push the start button on the right side of the handlebar. Use your thumb. The engine starts.
9. Give gas
The handle on the right side controls the speed. Turning the handle towards you gives gas to the scooter and you are starting to drive. Before releasing the break try to give a little bit gas to get a feeling for the power. You won’t until you release the break.
10. Release the break
If you feel comfortable release the break and give gas. But be carefully and start very slowly. Move your feets along on the ground. Don’t put them on the scooter yet.
11. Put your feet on the scooter
When you have the feeling that you have the scooter under control put your feed on the scooter and drive!
Notice:
If you rent a scooter in Sri Lanka or somewhere else in Asia, the rental company should always show you the basic functions of their scooters. Every Scooter is a little bit different like how to open the seat or where to fill the gas.
Scooter video tutorial

You need more information about your first time scooter ride? Watch the 30 min. online Tutorial to be prepared for the asian streets. The tutorial published on Udemy teaches you everything you have to know. It is perfect if you never drove a motorbike before or if you want to refresh your skills. The tutorial explains all basic functions of a automatic motorbike as well as driving skills like taking a second passenger with you.
Checklist before driving a scooter
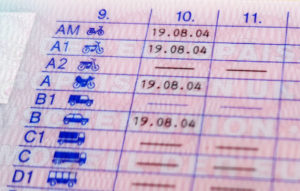
- Check if your driving lisence is valid to drive a scooter
- Take your passport and driving license with you
- Make photos of the scooter before renting it
- Use sunscreen